
How to use the ozone aging test machine
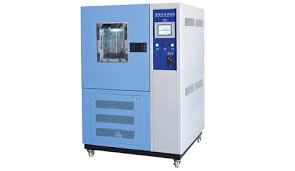
Ozone aging tester is a professional equipment used to simulate and accelerate the aging process of materials in an ozone environment. It is widely used in the research and development and quality inspection of polymer materials such as rubber and plastic. Correctly mastering its use is crucial to ensure the accuracy of the test results.
1. Preparation before the test
Sample preparation: Select representative samples to be tested, and their size and shape should meet the requirements of the test standards. Generally, it is necessary to ensure that the surface of the sample is flat and flawless to avoid affecting the test results due to defects in the sample itself. For rubber products, common dumbbell-shaped specimens must be cut strictly according to standard molds.
Equipment inspection: Before turning on the ozone aging tester, carefully check whether the appearance of the equipment is damaged and whether the cabinet door is well sealed to prevent ozone leakage. Check whether the electrical circuit connection is normal to ensure that there is no looseness or short circuit. At the same time, check whether key components such as ozone generators and temperature and humidity sensors can work normally, and calibrate them if necessary to ensure the accuracy of instrument measurement.
2. Parameter setting
Set appropriate test parameters according to test standards or material properties. The first is the ozone concentration, which is usually measured in ppm (parts per million). Different materials have different ozone tolerances. Rubber seals may be set at 50-100 ppm, while some outdoor plastic building materials require a higher concentration to simulate harsh environments, up to 200 ppm or more. The second is temperature, which is generally adjusted within the range of 25-40°C to simulate different temperature conditions in actual use. In addition, there is relative humidity, which is maintained at 40%-60%. Humidity will cooperate with ozone to affect material aging, which cannot be ignored.
3. Sample placement and test start
Carefully hang or place the prepared samples on a special fixture in the test chamber, taking care to avoid contact, squeezing or blocking of samples, to ensure that each sample can be fully exposed to the ozone environment. After confirming that the sample is placed correctly, close the test chamber door and turn on the equipment operation button. At this time, the equipment will start to create an ozone aging environment according to the set parameters, and the timing system will start synchronously to record the test duration.
4. Monitoring of the test process
During the test, the operator needs to regularly check the appearance of the sample through the observation window for signs of aging such as cracking, discoloration, and hardening, and pay attention to the operating status of the equipment, including whether the temperature, humidity, and ozone concentration are stable and maintained at the set value. If abnormal parameter fluctuations are found, the machine should be stopped in time to troubleshoot the fault to avoid invalid tests.
5. End of the test and data processing
After the scheduled test time is reached, stop the equipment and take out the sample after the ozone in the box is emptied and the environment returns to normal. Quantitatively evaluate the degree of aging of the sample, such as measuring the length and depth of the crack, and comparing the changes in mechanical properties such as tensile strength and elongation of the sample before and after the test. Through detailed data recording and analysis, provide a strong basis for material performance improvement and product quality judgment.
In short, rigorous and standardized operation of the ozone aging tester can make the test data truly reflect the ozone aging characteristics of the material and help scientific research and production practice.