
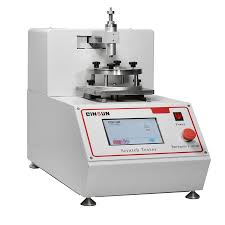
How to operate the Biocell Scratch Tester
The 100-grid scratcher is widely used in the field of material surface performance testing. Accurate operation of it can ensure the reliability of experimental data. The following is a detailed description of the operation process.
1. Instrument preparation
Before turning on the 100-grid scratcher, you need to check it carefully. First check whether the appearance is damaged, ensure that all parts are tightly connected, especially the scraping tool is firmly fixed, to prevent loosening during the experiment and affect the results. Connect the power supply, start preheating, and make the instrument reach a stable initial state. The preheating time depends on the instrument manual, generally 10-15 minutes. During this period, observe whether the indicator light on the control panel is normally lit to ensure the stability of the instrument's electrical performance.
2. Sample placement
Select a sample to be tested with a standard size and a flat surface, and gently wipe it with anhydrous ethanol cotton ball to remove impurities such as oil, dust, etc. to avoid interfering with the scraping effect. Place the sample stably on the instrument test bench and fix it with a clamp. Note that the clamp strength is moderate, both to ensure that the sample does not move during the scraping process and not to deform the sample due to excessive tightening. Adjust the position of the sample so that its scraping area accurately corresponds to the trajectory of the tool. The instrument can be calibrated with its own ruler, and the error is controlled at the millimeter level.
3. Parameter setting
Set key parameters on the control panel according to the test standard and material properties. For example, the scraping speed is set at 10-30mm/s for common materials. Soft materials should be at a low speed, and hard materials can be appropriately increased; the scraping stroke depends on the size of the sample to ensure that the key test area is covered; the scraping pressure needs to be accurately calibrated, with the help of standard weights, and adjusted through pressure sensor feedback. It is generally 1-10N, and different coatings and materials have different requirements. Review after the setting is completed to avoid misoperation and inputting wrong values.
4. Test run
Press the start button, and the instrument drives the scraping tool to move according to the preset parameters. Pay close attention to the entire operation, observe whether the scraping process is smooth, whether there is abnormal jitter or jamming, and whether the tool is always perpendicular to the sample surface. If you find something unusual, press the emergency stop button immediately to troubleshoot the problem. It may be tool wear, poor sample fixation, or mechanical transmission obstruction. Restart the test after the problem is solved.
5. Result recording and cleaning
After the test, use a microscope and image analysis software to observe the scratched part of the sample, measure the scratch width, depth, coating peeling area and other indicators, and record them truthfully. Finally, clean the instrument, disassemble the used tool and store it properly, wipe the test bench and fixture with a clean soft cloth, turn off the power, and prepare for the next test to ensure the accuracy and life of the instrument.