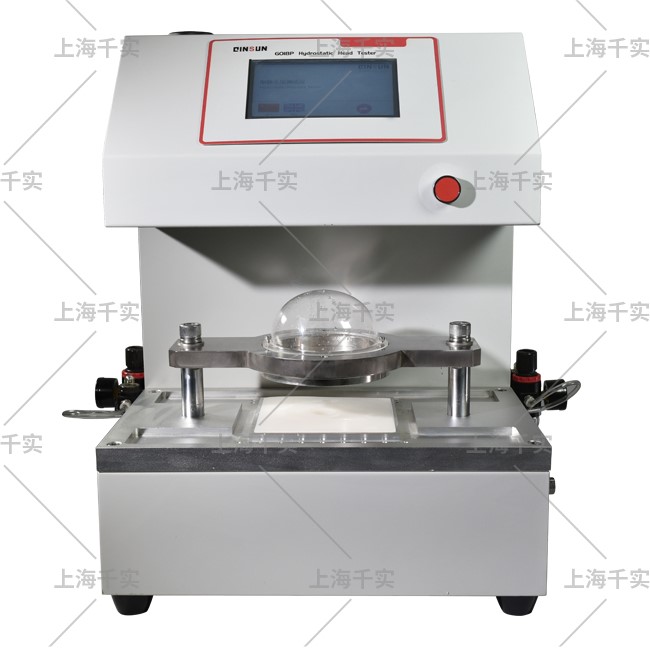
How to use and precautions for hydrostatic pressure tester
The hydrostatic pressure tester is suitable for measuring the water-resistant performance of various fabrics and non-woven fabric products that have been waterproofed, such as canvas, geotechnical materials, tent fabrics, and other materials. It is also called a fabric hydrostatic pressure tester, a fabric water permeability tester, a hydrostatic pressure tester, a hydrostatic pressure tester, etc. Below, Standard Group will briefly introduce the use and precautions of the hydrostatic pressure tester for the convenience of friends.
I. How to use the hydrostatic pressure tester:
When using the hydrostatic pressure tester for testing, please follow the instructions for use and fully understand the test methods, standards, and requirements to conduct the test correctly.
1. Inject about 1200ml of distilled water into the water tank of the test device.
2. Adjust the movable feet of the test device to keep the test device platform level.
3. Insert the pressure sensor, water level control, and electromagnetic pump plug of the test device into the socket behind the controller.
4. First, plug the three-core plug of the power cord into the power socket on the rear panel of the controller, and then connect the power plug to the 220V power supply.
5. Turn on the power switch, connect the power, and the "Ready" indicator light.
6. Rate selection: You can select the voltage increase rate according to the standard, or customize the setting.
7. Turn the rotating handle of the test device to the left to make the cloth-pressing triangular cover rise. After laying the sample flat, turn the handle to the right to make the cloth-pressing triangular cover fall and clamp the cloth sample.
8. Close the drain valve on the test device.
9. Press the [Start] button, the "Work" indicator light is on, and when the sample is sealed with the test hole, the test hole gradually builds up the water pressure, and the hydrostatic pressure on the sample is displayed by the digital tube.
10. According to the ISO 811 assessment method, when the third water drop just appears on the sample, press the [Stop] button, the instrument returns to the "Ready" state, the digital tube display value is latched, and the latched display value is the test result.
11. Record the test results and open the water valve. The distilled water in the test hole is returned to the water tank.
12. Press the [Reset] button to release the latched display value and reset the instrument program.
13. Remove the sample and proceed to the next test.
II. Precautions for using the hydrostatic pressure tester:
1. When conducting the test under normal atmospheric conditions, avoid excessive changes in temperature and humidity in the test site.
2. Distilled water must be used for the test and it must be replaced frequently.
3. When the instrument is working, press the [Start] button. Except for stopping the test, the [Stop] button cannot be pressed during the test, otherwise the test must be restarted.
4. During the test, in order to exclude the air in the test hole and the water is in direct contact with the cloth, before the test, fill the test hole with water (close the drain valve, press the [Start] button. When the test hole is filled with water, press the [Stop] button, and press the [Reset] button) and then put the cloth sample in for testing.
5. The standard points out that the results obtained at different rates may be different, so the selected rate should be indicated on the test report. It is recommended to use the 10 cmH2O rate gear when the water pressure resistance of the fabric is low, and the 60 cmH2O rate gear when the water pressure resistance is high. If you do not know the water pressure resistance of the fabric, you can use the 100 cmH2O rate gear for a preliminary test. After understanding the water pressure resistance value of the fabric, test it at the standard rate.
6. If the instrument is not used for a long time, the water in the water storage tank must be drained, and a metal object (such as a screwdriver) is used to short the water level electrode and the water tank shell, and the instrument is turned on to make the pressure empty for 10 seconds to drain the water.
7. When the pressed operation key is valid, a "beep" response sound will be heard. Otherwise, the key is invalid (when the operation sequence is not followed).
8. When the water level is lower than the electrode position: the buzzer will sound a long "beep" until the water is added to a sufficient water level. At this time, all keys are invalid. (Protect the electromagnetic pump)
9. When the water pressure reaches the maximum value: the buzzer will sound a "beep.beep." prompt, and the prompt will end after a few seconds. At this time, the instrument is in the [Stop] state.
10. During the test, if you hear a rapid "beep.beep." sound from the buzzer, the test process will be automatically terminated. This means that the water is not enough, and the automatic peeling is too much, causing the sensor to exceed the range (protect the sensor).

