Tel:+86-21-6780 0179
Fax:+44(0) 207 398 0999
Email:market@qinsun-lab.com

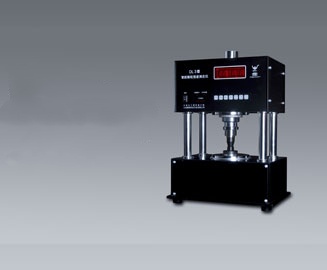
Particle Strength Tester

Intelligent Particle Strength Tester is an intelligent measuring instrument. It is a new generation product launched after the DLII Intelligent Particle Strength Tester. Its circuit principle and structure have been greatly improved, and the function of the whole machine has been further improved. It can be widely used in the determination of the crushing strength of spherical, strip, and columnar rigid materials such as catalysts, molecular sieves, fertilizers, activated carbon, aluminum phosphide, alumina, adsorbents, etc. in the chemical, pharmaceutical, and petroleum industries. It is a comprehensive product of the combination of microcomputer technology, electronic technology, and mechanical technology. It uses a single-chip microcomputer as the control core of the entire instrument, a high-precision force sensor as a force detection element, and a high-precision length-measuring device as a length-measuring instrument. The precision operational amplifier ensures the linear processing of analog signals. The instrument has high precision, full functions, simple operation, and a high performance-price ratio. The instrument has the functions of data storage, data repeated display and calculation. If the strength tester is used alone, it can display and store the crushing force value of each sample and can calculate the average value, standard deviation, coefficient of variation, low strength percentage, and other values specified in the relevant standards, which can be displayed repeatedly.
This measuring instrument has a stable force-adding speed, which ensures the accuracy of the test.
If you need to measure the radial crushing strength of strip samples and the axial crushing strength of columnar samples, you need to equip it with a special length gauge and it can automatically calculate and display the above values.
Connecting a special printer can print out the "Strength Test Report" with test and calculation results, and can connect to a computer to transfer the test data to the computer for saving or printing.
Special length gauges, PC communication interfaces, and special printers need to be purchased separately.
The host computer is connected to this instrument through a serial communication cable. The user writes the host computer communication software to communicate and control the instrument by himself, and the instrument is used as part of the test platform. After the system is integrated, the host computer platform software controls the data exchange with the instrument, so that the test data of the instrument is uploaded to the host computer, and the host computer performs unified data analysis and processing.
| Product Specifications | 150 | 300 | 500 | 1000 |
| Maximum force value load | 150N | 300N | 500N | 1000N |
| Maximum sample size | 25mm replacement sample table up to 40mm | |||
| Relative error | ±0.5% | |||
| display resolution | 0.1N | |||
| Maximum data storage | 2,000 individual samples | |||
| A variety of ways to work | The instrument provides four working modes, which can be set according to different usage conditions : 1-ball sample test 2- radial test (length tester) ; 3-axial test (length tester) ; 4- stack pressure measurement | |||
| Exception data processing | Abnormal data processing can be set, and three elimination methods are provided: 0- · No elimination; 1-one maximum and minimum; 2 two maximum and minimum | |||
| Low strength value setting | Can set the lower limit value of the qualified index (low intensity value), and can participate in the operation | |||
| Calculation function and display mode setting | The calculation of intensity mean, standard deviation, coefficient of variation and low intensity percentage can be performed. According to different needs to provide two display methods for choice: 1 one display all (original data and calculation results); 2 one display the calculation results. | |||
| Printing function and printing mode | Connect the printer to print out the strength test report of the raw data and the calculation results. According to different needs to provide two printing methods to choose from: 1 one print all (original data and | |||
| etting | calculation results); 2 one print calculation results. | |||
| Overall dimensions and weight | 340mm * 220mm * 480mm (length * width * height) · Net weight 28 Kg | |||
| working power supply | 220V±10% 50HZ | |||
| Complete machine power consumption | ≤200W | |||

